


50% OFF *FOR LIMITED TIME* DON'T MISS OUT!
Instantly transform your living room, bedroom, kitchen or anywhere in your house into a light show party! This is the perfect addition to any room that will really make your room unique! We're giving these out 50% OFF! *Limited Stock Available*, Don't miss out! With the multi color remote, the possibilities are endless with all the different color combinations you can imagine. Simply attach the strips to any surface with the adhesive, power it up and enjoy the results!
TECHNICAL DETAILS
- Non-waterproof
- Low power consumption
- Adhesive backing tape for secure and easy application to most surfaces
- Remote Battery: CR2025
- Long life span 50,000+ hours
- Flexible ribbon for curving around bends
- Cuttable every 3 LEDs along the cutting marks, according to practical requirement.
INCLUDES
- 1x IR Remote Controller
- 1x Wall Plug (USA, EU, AU, UK)
- Batteries not included due to shipping restrictions
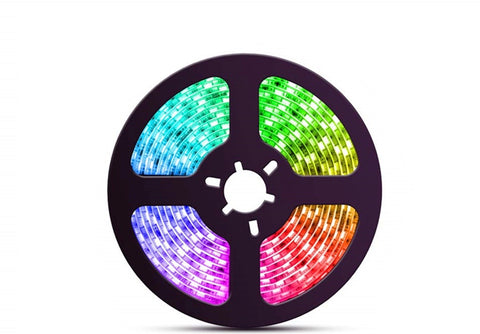
- 1x 5M or 10M or 15M RGB 300 Color LED Strip Light
EASY INSTALLATION
Strong double-sided tape installation, just peel them off and stick to clean, dry and flat surface, super-stick anti-slip, Can be cut every 3 LEDs along the cutting marks
INSTALLATION GUIDE
STEP 1: WARNING
NEVER TURN ON THE LIGHTS WHILE ROLLED UP BECAUSE IT CAN OVERHEAR AND DESTROY THE LED.
STEP 2: Plan your set up
- Measure the length of the area you want to set the lights on
- We recommend having LED lights go vertically or horizontally on your wall
STEP 3: Prepare a Clean Surface
- Properly use a rag or paper towel to clean off any dirt or dust in the area you'll be applying your LED lights onto. This will remove the dust and make the adhesive to stick & hold on strongly.
STEP 4: Reveal the Adhesive
- Gently peel back the plastic on the back of the LED strip to reveal the adhesive.
- Only need to peel only about 2 inches ahead to make sure the rest of the LED strip doesn't catch debris, dust or dirt while applying. This will help it stick better.

STEP 5: Installation
- Start applying the beginning of the strip against the wall gently.
- Make sure the lights stay in a straight line when applying them horizontally or vertically.
- Ask someone to hold the other end of the lights and peel the plastic a bit at a time from the adhesive to help make this process easier.
STEP 6: Make them Stick
- Connect the Controller Receiver both have arrows at the connection point at each end.
STEP 7: Connect Controller Receiver
- Properly Connect the Controller Receiver to your LED strip
- LED Strip and Controller Receiver both have arrows at the connection point.

STEP 8: Power on your Lights
- Connect a power supply to the Controller Receiver and plug it into the closest socket
Step 9: Check your Controller
- The Remote uses a CR2025 battery.
- Make sure you've purchased a battery at your closest retailer.
- After installing the battery, check remote by pointing it at the Remote Receiver.
- Now If nothing is happening, Not to worry just check that the battery was not inserted upside down. Try flipping it over and check to see its working.
STEP 10: ENJOY YOUR NEW LED SET UP!
